Most road trip stress with a dog comes from one root cause: the dog hasn’t been conditioned to ride. Not “doesn’t like the car” – hasn’t been taught what to do, where to settle, and how to manage motion. What follows is a step-by-step desensitisation progression built from standard counter-conditioning practice. It is organised as six stages, and each stage is gated by a behaviour you can observe rather than by a date on a calendar. We have deliberately removed the day counts an earlier version of this guide attached to each stage: we have no source for them, dogs vary enormously, and a number on a page invites people to push a frightened dog forward on schedule.
Disclosure: This article contains affiliate links. If you buy through our links, we earn a small commission at no extra cost to you. We only recommend gear that meets our research criteria.
Why this matters before your trip
A dog who panics, vomits, or vocalizes for hours in the car turns even a short trip into a problem. Worse, untrained car dogs are a real safety hazard: they distract drivers, can interfere with steering or pedals, and become projectiles in any accident. Training is not optional for safety, and the good news is that most dogs can be conditioned successfully with consistent work.
What this protocol is NOT
This is a training protocol for healthy adult dogs with no underlying medical conditions. If your dog has any of the following, work with a veterinary behaviorist first:
- True motion sickness with vomiting on every short ride (medical issue, treatable with vet support)
- Panic attacks with self-injury risk (specialized behavior medicine consult needed)
- Severe noise phobia triggered by engine sound (specific desensitization protocol required)
- Aggression toward family members in the car (immediate professional intervention needed)
For all other dogs, this protocol works. The single biggest failure factor is rushing the steps.
The 6-stage training progression
Stage 1: Car becomes a positive place
Goal: dog actively wants to be near the car. We’re not driving yet.
- Park the car somewhere quiet and accessible (driveway, parking lot)
- Open all car doors and the trunk/back area
- Lead your dog to the car on leash. Let them sniff, walk around, investigate
- Drop high-value treats on the ground near the car (NOT in the car yet)
- Short sessions of a few minutes, twice a day, repeated until the behaviour below is consistent
- End each session BEFORE the dog gets bored or stressed
Watch for: relaxed body language, tail in neutral or wagging position, willing approach to the car. These signal you can move to Stage 2.
Stage 2: Entering the car voluntarily
Goal: dog enters the car on their own and stays calm for 5+ minutes with the engine off.
- Place high-value treats in the back seat area (or wherever the dog will ride)
- Encourage the dog to enter on their own. Do NOT lift them in (this teaches the car is a place they must be forced into)
- Use a calm voice. Reward each step toward and into the car
- Once inside, scatter more treats. Sit in the car with them for 2-5 minutes initially
- Build up to 10-15 minutes of “just sitting in the parked car” with both doors open
- End each session by letting them exit voluntarily and rewarding the exit too
Some dogs jump in immediately and effectively skip this stage; others need weeks. Pace to your specific dog rather than to a schedule.
Stage 3: Doors closed, engine off
Goal: dog stays calm for 10+ minutes with doors closed and engine off.
- Get the dog comfortably inside per Stage 2
- Close one door at a time, slowly. Reward calm response
- Build up to all doors closed, engine still off
- Sit with the dog inside for 5-15 minutes
- Open doors and let the dog exit voluntarily
If your dog panics at the doors closing, drop back to Stage 2 and rebuild. The most common rush mistake is forcing this stage before the dog is fully comfortable with stage 2.
Stage 4: Engine on, not moving
Goal: dog stays calm for 5+ minutes with engine running but car not moving.
- Dog in the car per Stage 3
- Start the engine. Wait 30 seconds. Turn off
- Reward calm response. Build up to engine running for 5+ minutes without movement
- Some dogs react more to engine sound than to motion. This stage isolates that variable
If engine sound triggers panic, consult a vet about underlying anxiety. Many dogs can be desensitised to engine sound with this stage alone, given patient repetition.
Stage 5: First short drives
Goal: 5-15 minute drives that end at positive destinations.
- First drive: drive around the block (literally 1-2 minutes). Return home. Reward heavily
- Day 2: drive to a nearby park (5 minutes), play for 15 minutes, drive home
- Day 3: drive to a friend’s house (10 minutes), brief positive visit, drive home
- NEVER drive only to the vet during this stage. Mix positive destinations (parks, friend visits, trail starts) with neutral ones
- Build duration gradually, extending only once the previous length is consistently calm
The destination-positivity rule is critical. A dog whose first 10 car rides go to the vet learns “car = bad thing”. Reverse this from day 1.
Stage 6: Trip-length conditioning
Goal: 1-3 hour drives without stress.
- Once a half-hour drive is consistently calm, extend towards the length of your actual trip
- Schedule regular rest stops for water and a short walk
- Reward calm settling on longer drives. Many dogs sleep once the drive becomes monotonous.
- Try at least one drive to a new destination (not your familiar park) before the real trip
Equipment that supports the training
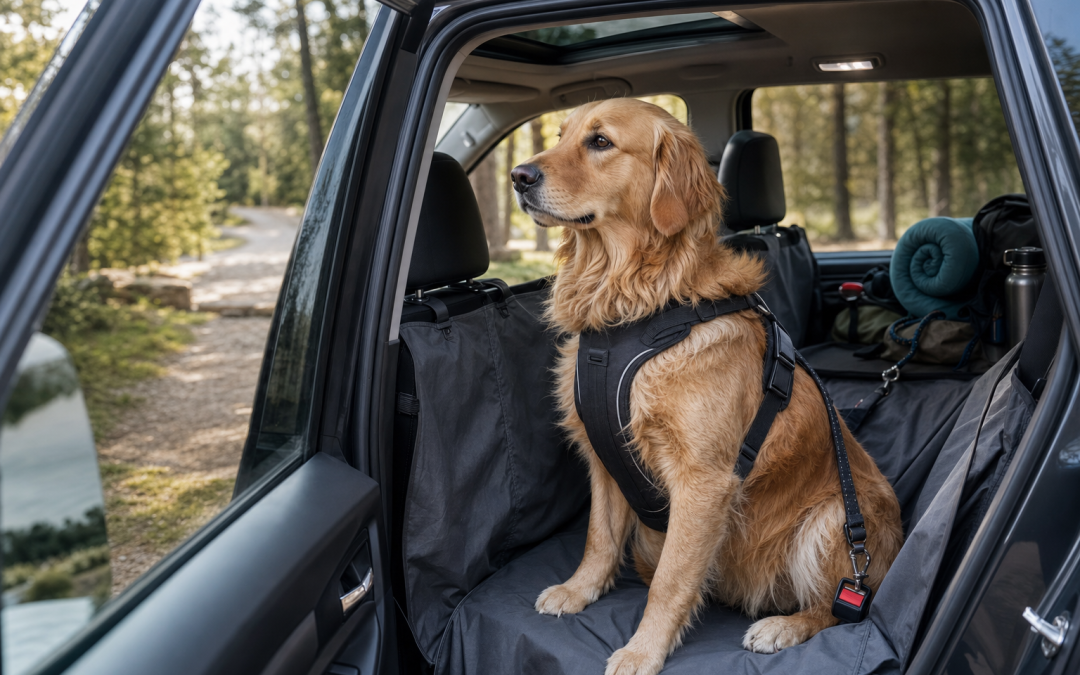
A car safety harness
A crash-tested harness is the point here, not just any harness. Two makers publish testing detail you can check.
Sleepypod states the Clickit Sport was crash-tested to US, Canadian and EU child safety standards, validated at 30 mph in accredited labs, and independently tested by the Center for Pet Safety, which gave it a five star rating and rated it to 25 lbs (11 kg). That weight rating matters: it is the load the certification covers, not the size of dog the harness fits.
Kurgo states the Enhanced Strength Tru-Fit was tested at an established university facility against the US Federal Motor Vehicle Safety Standard for child restraint systems, for dogs up to 34 kg, using weighted anatomically accurate test dummies rather than live animals.
One thing to know before you shop, because it trips people up: the Center for Pet Safety’s own certified products index lists only crates and carriers. Harness certifications are published on the individual product pages instead, so checking the index alone produces a false negative. CPS harness certification is real but rare, and the Clickit Sport is one of the few that holds it.
The practical distinction to carry into a purchase is between a third-party certification, which Sleepypod has, and manufacturer-published testing, which is what Kurgo offers. The second is far better than an unsupported “crash-tested” sticker and is still not the first. Be sceptical of any harness that says “crash-tested” without naming a lab, a standard and a tested weight. See our dog car accessories guide for more options.
A back seat barrier or cargo divider
For dogs who try to climb to the front, a barrier keeps them safely in the back. Critical for solo driving with a dog.
A hammock-style seat cover
Protects the back seat from hair, mud, and accidents. Also creates a defined “dog area” that helps with training. See our hammock car seat cover guide.
A travel water bottle and bowl
For longer drives you will stop regularly for water. A collapsible bowl makes this easy. See our collapsible water bowls guide.
Motion sickness: when training isn’t enough
Some dogs experience genuine motion sickness, especially puppies and young dogs (the inner ear is still developing). Signs include:
- Excessive drooling on every car ride
- Restlessness then sudden vomiting
- Pale gums or yawning excessively
- Refusing food before drives
For genuine motion sickness, talk to your vet about Cerenia (maropitant citrate). Zoetis describes it as the first veterinary FDA-approved medication for canine vomiting due to motion sickness, and the label covers prevention of vomiting due to motion sickness in dogs 4 months and older. It can be given preventively before a known long trip. Note that “first approved” is not the same as “only option”, and dosing is a decision for your vet, not for a gear guide. Puppies commonly do grow out of motion sickness as the inner ear matures, though we have no sourced figure for the age at which that happens.
Things that help motion sickness without medication
- Skip the meal immediately before the drive, since a fuller stomach is more likely to come back up. Your vet can tell you what gap suits your dog.
- Cool air circulation (open window slightly, run AC)
- Driving smoothly (avoid sudden braking, sharp turns where possible)
- Limiting visual stimulation (a covered crate can help severe cases)
- Stopping frequently for breaks during early conditioning, more often than you would on a normal drive
The road trip day-of routine
Once your dog is trained, the actual trip day:
- Exercise well before departure rather than immediately before loading. A tired dog rides better, and a dog still panting from a run does not settle.
- Feed well before departure rather than just before, or skip the pre-trip meal entirely, per the motion sickness section above.
- Pre-departure potty break immediately before loading. Don’t skip even if you’re running late.
- Load with calm energy. If you’re stressed, the dog reads it. Calm voice, deliberate movements.
- Early in the drive: let the dog settle. No interaction beyond brief check-ins.
- Regular rest stops with water and a brief walk. Build them into the route rather than waiting until someone needs one.
- Never leave your dog in a parked car. Not with the window cracked, not in the shade, not for five minutes. A parked car heats far faster and far higher than the outside temperature, including on days that feel mild. An earlier version of this guide named a specific temperature threshold. Publishing one invites people to treat anything below it as safe, and we could not source the figure, so it is gone. There is no outside temperature at which a dog alone in a parked car is a good idea.
Recommended car safety harness
Check Sleepypod Clickit Sport on Amazon
Recommended back seat hammock cover
Browse Hammock Seat Covers on Amazon
Recommended collapsible travel water bowl
Browse Collapsible Bowls on Amazon
FAQ
How long does it take to train a dog to ride calmly?
Honestly: it depends on the dog, and we are not going to give you a number we cannot source. Some dogs work through the whole progression in a couple of weeks. Others, especially those with existing bad associations, take months. The factor within your control is consistency, and short sessions twice a day beat one long session a week.
What if my dog is already terrified of the car?
Start with Stage 1 even if they’ve ridden before. The previous negative experiences need to be overwritten with new positive ones. This usually takes longer than starting with a dog that has no history with the car, but the progression still works.
Can I use anti-anxiety medication during training?
Talk to your vet. Situational anti-anxiety medication (trazodone, gabapentin) can be useful for severe cases to allow training to proceed. The goal is to taper off medication as the dog gains confidence, not to medicate indefinitely.
My dog rides fine in our car but panics in others. Why?
Generalization is a separate skill. Repeat Stages 1-3 with other vehicles (friend’s car, rental, etc) to build cross-vehicle confidence. Expect to repeat the early stages in each new vehicle before the behaviour generalises.
Should my dog ride in a crate or harness?
Both work. Crates provide containment (no projectile risk, no distraction) but require more space. Harnesses keep the dog more comfortable and visible to you. Choose based on your vehicle, dog size, and trip length. For longest highway trips, crash-tested harness or crate is safest.
Where to go from here
These companion guides cover the gear side of road trip prep: